White Hat Blogging is a participant in the Amazon Services LLC Associates Program, in addition, I am an independent Jasper Affiliate, not an employee. I receive referral payments from Jasper and possibly other affiliates.
I have heard many people ask the question about why should they switch to a cloud based server platform, today we will jump into what Cloudways is and how powerful it can be for your page speed scores. So then why use Cloudways for my hosting?
Their service and technology stack is built to serve all your content faster, unlike many hosts that work to make the front end faster for visitors. In Cloudways the stack helps you as it also allows the backend to fly which makes your work faster and more efficient!
Lets take a look at how and why Cloudways can get high speed performance for a cost very equal to other shared hosts while allowing you your own cloud based server.
What is Cloudways Hosting?
Cloudways is a company that allows you to add servers through specific cloud hosting services, offering servers through Digital Ocean, VULTR, and others they then build the server with their stack of web technology.
They offer a managed service to help those who don’t want to try and manage updates and support for their own cloud instance, this helps take in people with limited technical skills but provide them the performance benefits.
They offer a free trial where you could clone and test out how your same website would perform on their hardware here.
Is Cloudways Shared Hosting?
When you operate in the cloud you have a server built that is yours alone, it won’t have other peoples servers built on it but the difference is that they build multiple cloud servers from one set of physical hardware.
While this is definitely not shared hosting you do have a version of shared resources since the farm to create servers will have multiple servers running from one set of hardware which differs from shared hosts like Bluehost or SiteGround.
You can think of it as shared hosting you and others have websites on the same server, in cloud hosting you have your own server sitting on shared infrastructure, like processors, memory, and disk space.
Is Cloudways Worth It?
For myself I find it incredibly useful as I am migrating my sites over as my existing contracts with shared hosting plans come to an end, the speed and ability to grow the servers makes it a perfect long term tool at an amazing cost.
When you purchase shared hosting they entice you with costs of $2-5 a month, but as soon as that initial contract ends these rates typically grow by a factor of 5-7x and that $2 hosting becomes $14 but with many more limitations.
I find the ability to make a $13 server that can host 4-5 websites without blinking and that I can grow as resources become needed a much better option as a long term affiliate marketer as the cost is based on needs.
How to Add Server in Cloudways
First you need to sign up for a free trial account once you have this then you can start to build your first server, once you have this server then we can talk through more on adding WordPress and your domain.
How to Install WordPress on Cloudways
First you just will want to click on the server tab up top and then on the [ Create New ] button in the top right hand side as shown below.

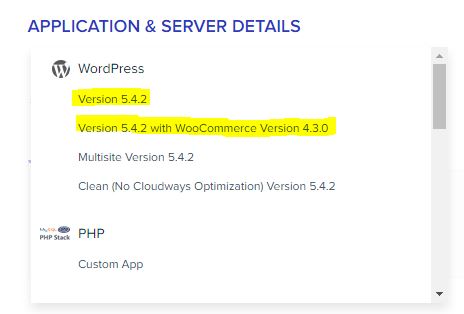
This will take you to the details area on what you want to have on the server you built, this can be a wide range of application but we are going to stay focused on WordPress, so you will choose WordPress with or without WooCommerce (if you want a shop).
Once you choose this you will need to add a name for your Application (I use the domain name), the Server (However helps you manage), and a Project (I call mine WordPress). This just helps organize all the servers and applications.
Next you will choose your host for the cloud based server, if you want to get impressive speeds I would suggest the configuration in the image below as the VULTR HF uses faster processing cores making the front and back speed load much faster.
You will change to VULTR as the provider, change your server sizing to High Frequency from Standard and I leave it at 1 core (works for 3 sites for me without issue though your site size will matter).
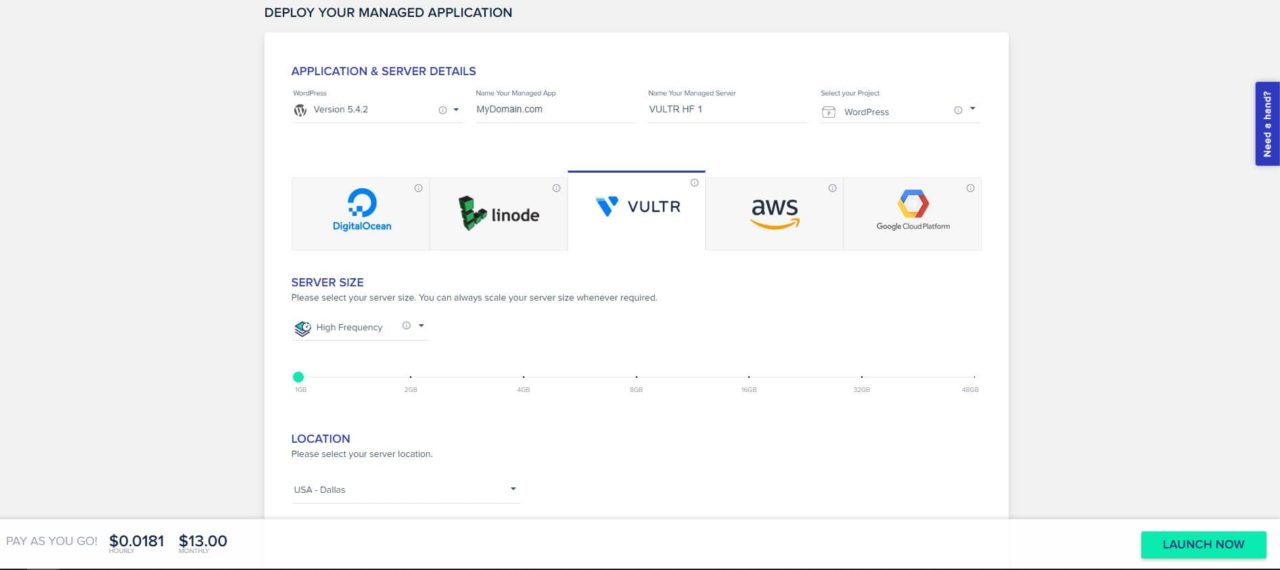
- Application: WordPress (Current Version)
- Host: VULTR (Only one to offer HF CPU Cores)
- Server Size:
- Change to High Frequency
- Leave default at 1GB Ram (Can upgrade server after if see performance on large sites)
- Location: Dallas (Choose closest to you)
Choose a location, I prefer near me in the first place for faster access and speeds and then implement a CDN for other users.
Once you set all the settings you want to click on the [ Launch Now ] button to get them building and preparing the server, this will then tell you a time to how long until the server is available and ready.
How Does Cloudways Pricing Work?
As you saw in the above and in a zoomed in version below the Cloudways server price is billed on the per hour time for the server and then they should you what the monthly costs will come out to for that server itself.

What I show above is for the VULTR HF server and each server will have a different monthly and hourly cost based on the host and the choices you add to it, I always go this way and it offers INCREDIBLE performance so I suggest it.
How to Add Apps in Cloudways
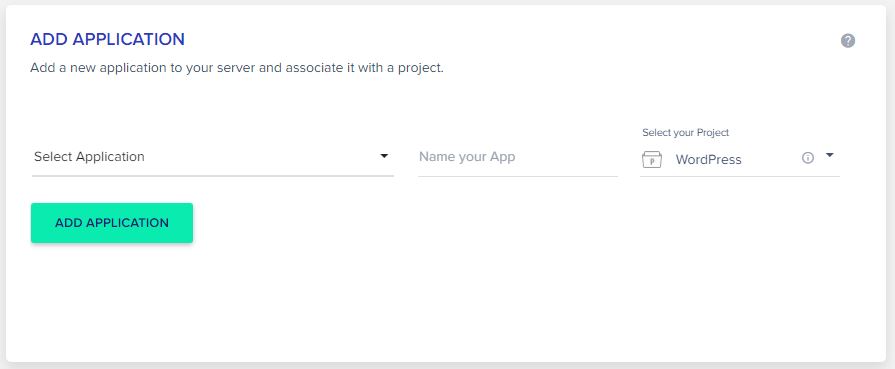
If you would like to add a second App, additionally to the one you created when you built the server you can go into the [ Applications ] top tab and add a new App to the existing server through the [ Add Application ] button.

After this you will need to choose the server you already have to add this Application onto.

Now you will be able to choose which application you want to add and what the name of this application will be and which project it should be included within.
Now you can move to adding a domain onto this new application so that users can reach it with a normal domain name instead of the temporary one given by Cloudways to build.
How to Add Domains to Cloudways Apps
Once your default application is built you will see it pointed at a vague URL basically as a placeholder as you could work from this location if needed, should you want to point it at your domain this can be done very easily.
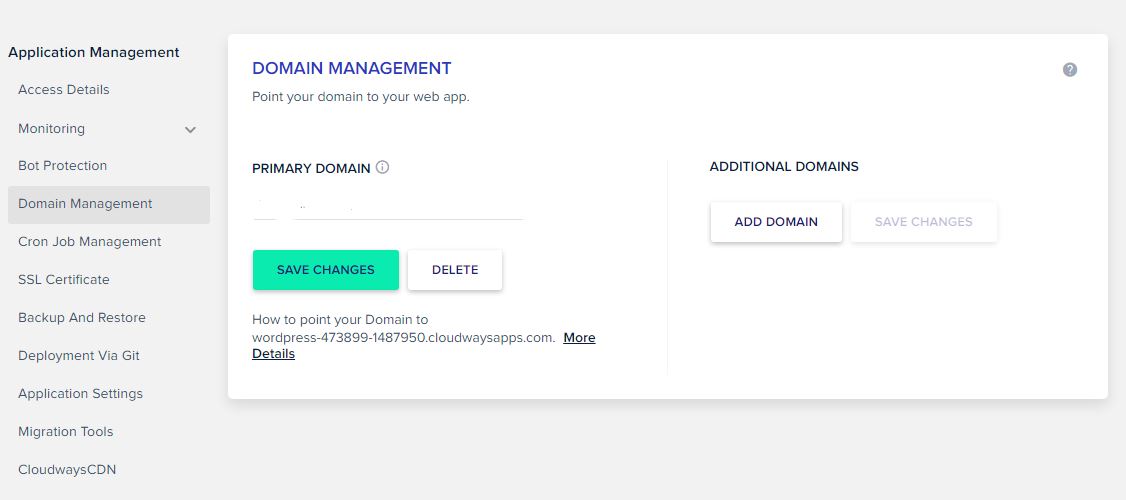
- Open Your Application in the Cloudways Control Panel
- Inside [ Application Management ]
- Select [ Domain Management ]
- Change [ Primary Domain ] to your domain name
This will conclude your settings for your application itself to use the domain name, now you will need to go to your domain management (whoever you purchased the domain from) as I keep this split from hosting with NameCheap.
For NameCheap you can see where I added the [ A Record ] to my domain to ensure it points at the new server (need to have your server IP Address).

As you can see this is a pretty fast configuration that only requires you to choose the [ A Record ] type, the [ @ ] says all requests, [ IP ADDRESS ] is for your server created above and automatic to update frequency.
After you add this record it could be nearly instant to 48 hours for full replication to happen across the world to point to this server with your domain.
How to Create Subdomain in Cloudways
This is very similar to the normal domain and application setup with a few caveats around the record you need to add to your domain control setup, instead of an A record in this case you will need to setup a CNAME record.
In Cloudways you will create your server but when it comes to the primary domain name section you will instead enter the subdomain and url as a complete string like:
staging.domain.com
Then you will need to go make a record in the domain to point at this instance with your CNAME record, below is an example, this would then route any request at this CNAME to the IP address you specify.

As with previous setups any domain changes may have replication times of up to 48 hours in most cases, so you may need some patience afterwards to see this work as expected.
How to Migrate WordPress Site to Cloudways
Cloudways has a plugin to help you migrate your site painlessly from any other host onto their platform and it is incredibly painless as it is simply going to need that you built your Cloudways server above and have that application information available.
Once you have built a server and a application you can go into the application settings and find [ Migration Tools ] from the left hand menu, this will help you to download the migration plugin for WordPress.
When you install this plugin and activate it you will then have the option to prepare your site for a migration, this doesn’t remove your current site nor change any pointers so it can help you test their service with your site to see speed benefits.
Inside WordPress you will be presented with the following screen inside the plugin to start the migration of your site onto their platform:
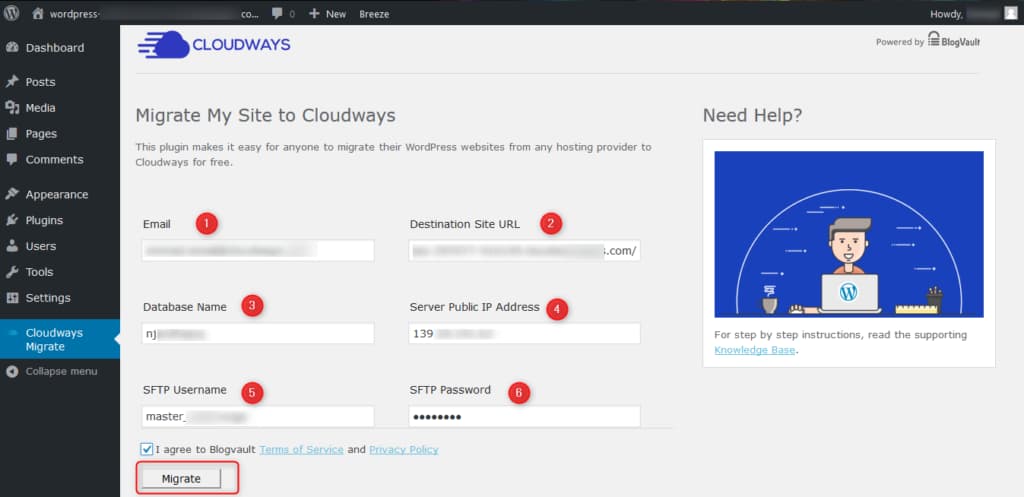
Where can you find this within Cloudways you may wonder, well here is the easy mode through images to align them.
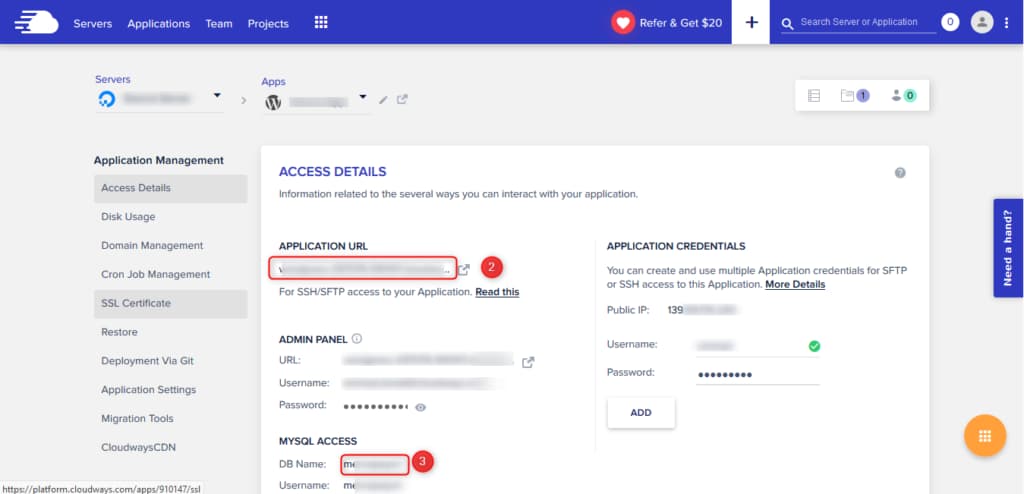
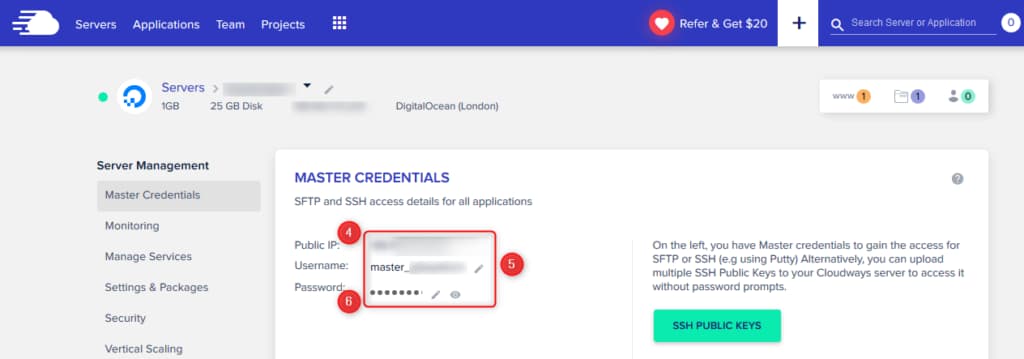
Then you will want to click [ Migrate ] and for me this process took longer the older my site was and the more data it had on it so your mileage may vary greatly but let this process complete.
Once you have migrated across you can follow the domain steps above to set the domain and repoint from your existing site to this new hosting account, once replicated and you se [ Breeze ] in the admin bar you will have completed DNS propogation.
How to Add Email in Cloudways
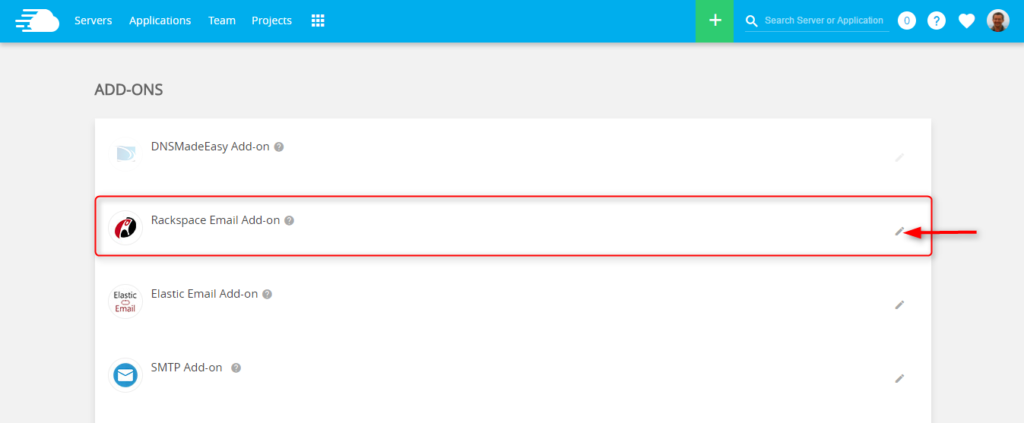
This can be done in many ways, I use MXRoute as I got a lifetime deal but if you don’t have an email provider Cloudways partnered with RackSpace and provides you the possibility to use an Addon to your Application and domain and get an email account for $1 per month.
This is only $1 / month per mailbox

Video: Ad Redis Object Caching To Increase Performance
My Cloudways Review and Final Thoughts
Since VULTR HF became possible within the Cloudways platform I have been moving and migrating sites over as they get massive increases in speed and performance with the technology stack and fast CPU core speeds.
I have had no success with Breeze and performance and would suggest instead if you want a caching plugin that you purchase WP Rocket or get yourself onto Ezoic and use their integrated CDN to enhance those functions.
While the server may cost more per month than many shared hosting plans your server is yours alone and you can add sites to this server and build it up with more power and processing as needed instead of hitting the artificial limits imposed with many hosting plans.
The ability to get backups and build a new server also means you have the ability to keep functioning even if a server should fail you have less stress over not having a backup made before.

